
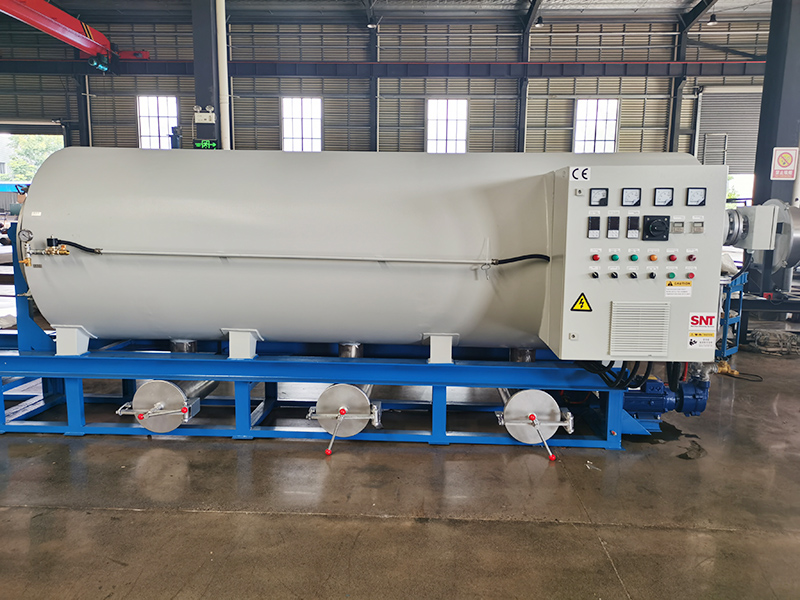
Removing Oil and Grime from Screw Cleaning Furnace Control Panels
Safe Power-Down and Initial Surface Prep
The first step is always to make the control panel safe to clean. Turn the furnace off at the main disconnect switch and follow your facility’s lock-out/tag-out procedure. This is non-negotiable; cleaning a live electrical panel, even just the exterior, risks causing a short circuit or accidental activation. Wait a few minutes for any residual charge in the system to dissipate. Use a non-contact voltage tester near the power entry points to double-check that the panel is de-energized before proceeding with any cleaning.
Remove loose surface debris with dry methods. Use a soft-bristle brush or a clean, dry microfiber cloth to gently sweep away any dust, metal shavings, or dry particulate matter from the console surface, button crevices, and screen edges. A small, handheld vacuum with a brush attachment is excellent for this. The goal is to remove abrasive particles that could scratch surfaces during the wet cleaning stage. Pay close attention to the gaps around membrane switches and the seams where the panel meets the enclosure, as these areas trap the most grit.
For light, fresh oil smears, a dry approach often works. Sprinkle a small amount of an absorbent powder like cornstarch or a commercial oil-absorbent compound onto the oily area. Gently rub it in with a dry cloth; the powder will absorb the oil. Let it sit for a few minutes, then brush or vacuum the powder away. This method is particularly useful for touchscreens and delicate labels, as it avoids introducing any liquid that could seep underneath.
Targeted Cleaning of Different Surface Types
For painted metal surfaces and general plastic housings, use a mild degreasing solution. Mix a few drops of dish soap or a dedicated electronics-safe cleaner into a spray bottle of warm water. Do not spray directly onto the panel. Instead, lightly mist a clean microfiber cloth until it is damp, not wet. Wipe the surface in one direction, applying light pressure. For stubborn spots, hold the damp cloth against the area for 30 seconds to allow the solution to penetrate the oil, then wipe clean. Immediately follow with a second, dry microfiber cloth to remove all moisture and prevent streaking.
Cleaning membrane keypads and tactile buttons requires extra care. Use a cotton swab slightly dampened with isopropyl alcohol (70% or higher). The alcohol evaporates quickly and leaves no residue. Gently roll the swab around each button and in the grooves between them. Use a fresh swab as soon as it shows dirt. For raised buttons, you can wrap a thin cloth around a flat tool to clean their sides. Never pour or spray liquid directly onto a keypad, as it will almost certainly seep underneath and damage the contacts.
Touchscreens and display windows demand the gentlest approach. First, use a can of compressed air or a soft brush to remove any dust that could scratch the surface. Then, apply a small amount of a cleaner specifically formulated for coated glass and anti-glare screens to a ultra-soft, lint-free cloth. Wipe the screen in a circular motion with minimal pressure. Avoid cleaners containing ammonia, acetone, or ethyl alcohol, as these can permanently damage anti-reflective and oleophobic coatings. A slightly damp cloth with distilled water is a safer alternative if no dedicated screen cleaner is available.
Final Drying and Protective Measures
After cleaning, the panel must be completely dry before re-energizing. Use a dry, lint-free cloth to go over every surface, seam, and crevice you cleaned. Compressed air from a can, held upright to avoid spraying propellant, can be used to blow moisture out from under buttons and from port openings. Allow the panel to air-dry for an additional 15-30 minutes in a well-ventilated area. Do not use heat guns or hair dryers, as concentrated heat can warp plastics or damage electronic components.
Consider applying a protective film or coating to high-touch areas. For metal surfaces, a very light application of a corrosion-inhibiting spray on a cloth, wiped on and then immediately buffed off, can create a barrier against future oil adhesion. For screens, an anti-fingerprint coating can make subsequent cleanings much easier. Always verify that any protective product is compatible with the materials (plastics, coatings, paints) on your specific control panel. Test it on a small, inconspicuous area first.
Establish a routine to prevent heavy buildup. Keep a box of lint-free wipes near the furnace. Encourage operators to quickly wipe down the control panel with a dry wipe at the end of each shift, focusing on the start/stop button, temperature dials, and other frequently touched areas. This five-second habit prevents oils from hands from accumulating and hardening, making the deep cleaning process far less frequent and much easier. Store cleaning supplies in a sealed container nearby to keep them free of workshop dust.


