
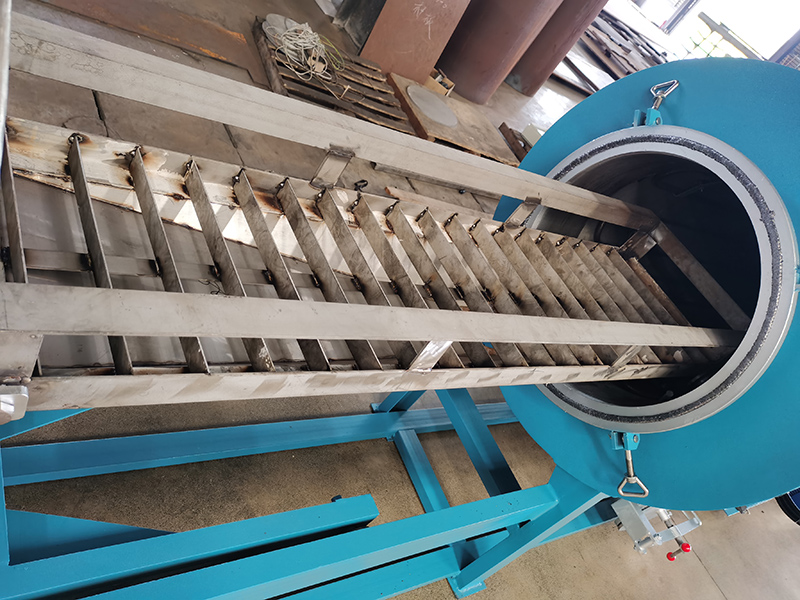
Filter Component Replacement and Care for Screw Cleaning Furnaces
Pre-Replacement Preparation and System Isolation
Begin by running a complete low-temperature no-load cycle to push any leftover material particles out of the filtration area. This gentle heat run softens thin sticky films on filter surfaces, making them far easier to remove without tearing delicate internal layers. Shut down the furnace and cut all power sources, including any secondary control systems that might still send signals to the filtration unit. Post a clear physical lockout tag on the main power switch, so no one can accidentally start the machine while you are working on the filter housing. This basic safety step prevents almost all unexpected motion that can cause serious injury during filter replacement.
Let the entire filter housing cool down fully before you attempt to open any access panels. Even if the outside feels cool, internal chambers near the filter media can hold trapped high-temperature air for hours, which can burn your hands and also release sudden hot fumes when you break the seal. Place a work light near the filter housing so you can see clearly into every corner, especially if the furnace sits in a spot with low ambient lighting. Proper lighting helps you spot tiny alignment marks and small fastener positions that are easy to miss in the dark, preventing incorrect reassembly later.
Collect all necessary replacement parts and tools on a clean work surface near the furnace, so you do not need to walk away and leave the system open while you search for a missing piece. Having everything ready at hand lets you work in a smooth, continuous flow, which cuts down the total time the furnace is open and exposed to workshop dust and moisture. Wipe down your tools with a dry cloth before you start, to make sure no old grease or metal shavings from a previous job get transferred into the clean filter housing.
Step-by-Step Removal and Installation Process
Open the filter housing access door slowly, listening for any faint hiss of trapped air pressure that might still be inside. If you hear air escaping, wait a few more minutes for the pressure to equalize fully before you pull the old filter out. Remove all fasteners that hold the filter frame in place, and set them aside in a small container so none get lost on the floor. Lift the old filter out in a straight, steady motion, avoiding any sharp twists that could break off fragile sections and leave debris inside the housing. Place the used filter directly into a sealed disposal bag, to prevent loose residue particles from spreading back into the workshop air.
Wipe the entire inner surface of the filter housing with a dry, lint-free cloth before you install the new unit. Remove every speck of dust, fine ash, and small metal shavings that have collected in corners and along sealing edges. Even tiny leftover particles can get pushed into the new filter media during the first few operating cycles, reducing its effective lifespan far faster than normal wear. Pay extra attention to the sealing groove where the filter frame sits, making sure the surface is completely smooth and free of any old gasket material or hardened residue that could keep the new seal from sitting flush.
Place the new filter into the housing with the airflow direction arrow pointing the correct way. Do not force the filter into position if it feels tight; instead, lift it out and check for small obstructions along the frame edges that you might have missed during cleaning. Once the filter sits fully in the groove, press down evenly on all four corners to make sure the sealing gasket makes full contact with the housing surface. Replace all fasteners and tighten them in a cross pattern, applying equal pressure at each point to avoid warping the filter frame. A warped frame creates small gaps that let unfiltered air bypass the media completely, making the new filter far less effective right from the start.
Post-Installation Function Verification and Early Use Monitoring
Close the filter housing access door and secure all latches fully before you restore power to the furnace. Run a short, low-temperature no-load cycle first, and stand near the filter housing to listen for any unusual whistling or hissing sounds that signal an air leak. Place your hand near the seams of the housing to feel for faint air movement that should not be there if the seal is sitting properly. If you detect any leak, shut down the furnace immediately and reopen the housing to check the filter frame alignment and sealing surface, instead of letting the leak grow worse under full operating pressure.
Check the pressure gauge reading on the filtration system once the furnace reaches its standard operating temperature. Compare the new reading to the value you recorded just before you replaced the old filter. A significant drop in pressure differential tells you the new filter is working as expected, with far less airflow restriction than the clogged old unit. If the pressure reading stays high or climbs quickly during the first few cycles, there might be a hidden blockage somewhere else in the exhaust path that you need to locate and clear.
Note the installation date and initial pressure reading on a small label attached near the filter housing. This creates a simple visual record for the next maintenance check, so you can track how quickly the filter load builds up under your specific operating conditions. Run the furnace through three full production cycles with the new filter, and check the pressure reading after each run to confirm it stays stable. A filter that shows a sudden large pressure jump after just one or two runs might have a manufacturing defect or might be the wrong specification for your furnace model, and it is far better to catch this issue early than to let it run for months with poor performance.



