
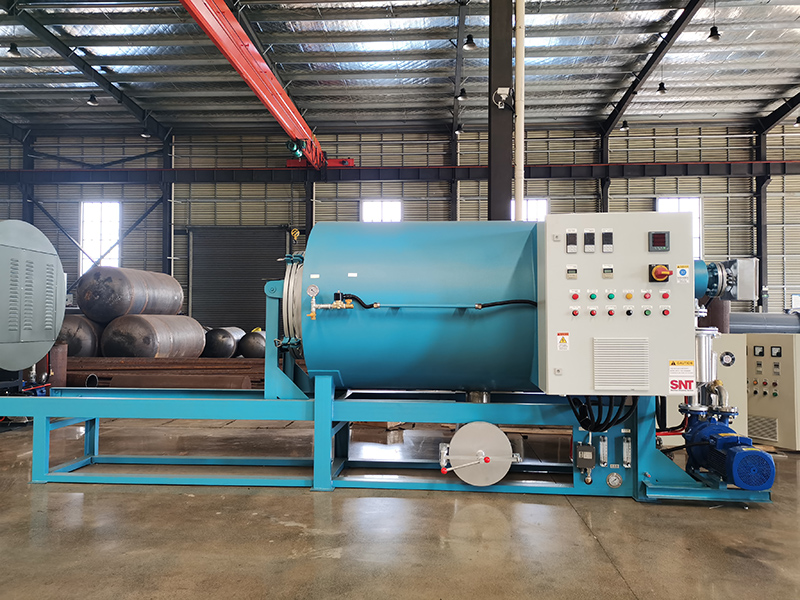
Full Machine Maintenance for Screw Cleaning Furnace After Production Runs
Immediate Post-Shutdown Steps Right After Production Ends
Start the process once the last screw load is pulled out and the main heating system is switched off. Do not leave residual material sitting inside the furnace chamber while it cools down, as these deposits will harden into a stubborn, carbonized layer that sticks tightly to inner walls and hidden gaps. Run a short, no-load low-temperature cycle for 10 to 15 minutes first, to soften any thin leftover residues that are still clinging to internal surfaces without causing extra thermal stress. Open all accessible access panels slowly once the internal temperature drops below 100°C, to release trapped hot air in a controlled way instead of letting sudden temperature shifts warp thin metal components.
Wipe all external contact points around the loading opening with a lint-free, heat-resistant cloth before they cool fully. Pay extra attention to the sealing edges around the door frame, where small bits of melted material often squeeze out and solidify into sharp, hard flakes. These flakes can scratch the sealing surface on the next run if they are left untouched, creating tiny gaps that hurt temperature consistency later. Do not use sharp metal scrapers on these soft sealing areas, as even a small scratch can create a leak point that builds up more grime over dozens of production cycles.
Check all visible connection points for loose debris that got kicked up during operation. Brush away fine dust and small material particles from the ventilation grilles on the machine frame, so the natural cooling path is not blocked while the furnace continues to cool down completely. Blocked ventilation will trap leftover heat inside the machine body, making internal electrical and structural parts stay at a higher temperature far longer than they were designed to, which speeds up hidden wear you cannot see right away.
Deep Cleaning for Internal Chambers and Hidden Paths
Wait until the entire furnace reaches room temperature before you start this step, to avoid accidental burns and make sure all residues are fully solid and easy to remove. Use a soft bristle brush to sweep loose deposits off the inner chamber walls, working from the top down so all fallen debris collects at the bottom drain point. Do not spray liquid cleaning agents directly onto hot internal surfaces, as sudden evaporation can create pressure buildups that push fine particles into narrow gaps you cannot reach. Apply cleaning solutions only to your wiping cloth, not directly to the furnace walls, to control how much moisture enters the internal space.
Run a gentle airflow through all internal ventilation channels after you wipe down the main chamber. This pushes out tiny leftover particles that got stuck in narrow bends of the air circulation system, so they do not break loose and land on the next batch of screws you clean. Inspect the corners of the chamber that are out of direct line of sight, especially spots near the heating elements, where thin layers of carbon residue build up slowly over repeated production runs. Even a thin, dark layer here can lower heat transfer efficiency over time, making the machine use more energy and take longer to reach target temperatures on future runs.
Wipe down all internal support structures that hold the screws in place during cleaning. Remove every small piece of leftover material that got caught in their grooves, as these bits will melt again on the next run and stick to the fresh screw surface. Rotate these support points slightly during the wipe-down, so you can reach the side that usually faces down and collects hidden grime that most routine checks miss.
Post-Maintenance Checks and Idle Storage Prep
Close all access panels and secure every latch loosely first, before running a 5-minute test of the core moving parts without turning on the heating system. This lets you confirm no small cleaning tool or stray cloth was accidentally left inside the chamber before you lock everything down fully. Listen for any faint scraping or sticking sounds that do not show up during normal no-load runs, which can tell you a small debris piece is still caught somewhere in a moving path. Do not skip this quick test, as running the machine with a foreign object stuck inside can cause unexpected wear that shows up weeks later.
Inspect all surrounding areas around the furnace for spilled material or pooled cleaning liquid. Wipe the floor around the machine base completely dry, so no moisture seeps into gaps under the machine frame and causes slow rust on hidden base components. Make sure the area around the furnace stays well ventilated for the first few hours after you finish all cleaning steps, to let any tiny amount of leftover moisture in the chamber evaporate fully instead of getting trapped and causing corrosion.
If the furnace will sit idle for more than three days after production ends, leave the main door cracked open by a small, controlled gap. This prevents trapped stale air from building up inside the sealed chamber, which can cause faint oxidation on bare metal surfaces that will flake off and contaminate the next screw load. Place a small, moisture-absorbing pouch near the air intake if the storage space has high humidity, to keep the internal environment stable while the machine is not in use. Do not fully seal the furnace for long idle periods, as trapped moisture is one of the most common causes of unseen part degradation that only shows up when you start the next production cycle.



